

The Tweak'd Performance harness left me very little slack to mount the coil and ignotor. Since the ignitor is smaller I bolted it right above the booster as shown. Went down to the local hardware store and bought some allen bolts and nuts for a clean look. I just pulled the vent out to access the space behind the allen heads to put the nuts on.


The coil was not going to mount well in that vicinity so I extended the two wires using solder and shrink tubing. This allowed me to mount the coil down where the stock 16v coil mounted before. Since I am not actually using the coil to fire (just for the signal) it doesn't matter where it's mounted as long as it's plugged in. I had my friend Aaron (a fabricator/welder) fab me up a bracket to hold the coil using the stock mount location. I'm happy with the results on the bracket, I threw some Rustoleum red paint and some allen hardware on there too.


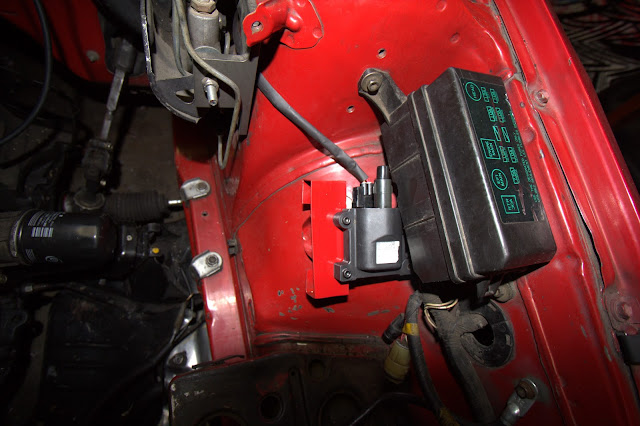
I tried to mount it as tucked as possible in the stock location, fitting perfectly under the fuse box.

Another problem I had to solve was the large vacuum port on the manifold for the first cylinder. So I found a bolt with the same thread pitch and cut cut it shorter to plug the hole. If it's too long then it portrudes into the airflow, if it's too short it would leave a little valley where the air flows. With a little trial and error by opening the throttle plate and looking inside with a flashlight, I got the bolt to the right length.

It is this bolt right under the tps sensor:

I was excited to put the fuel line in today, so I put off eating and spent an extra hour hooking this up. I had the choice to run the SS line up above and come down on the connection on the fuel rail, or tuck it underneath and come up to the fitting on the fuel rail. I chose to tuck the fuel line underneath, it's not like people won't notice it and it serves it's purpose. I'm big on making everything as minimalistic as possible under the hood while retaining functionality.

If you would like to get the part numbers for all the fuel parts needed including the gauge, check my 20v swap list with prices post.

The fuel line comes through nicely with minimal rubbing on any components.

Here the fuel return line and harness were running parallel so i zipped them together. I'm a little worried about the return line being so close to the water pipe, but I did retain the stock foam sleeve.

*
No comments:
Post a Comment